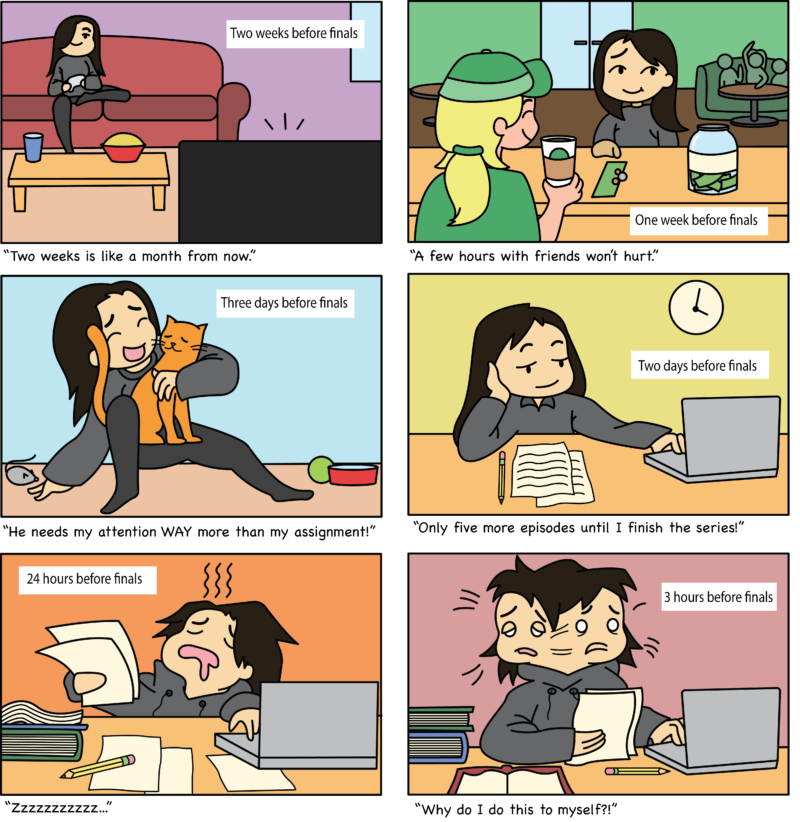
If you’ve read this paper since last November, you’ve seen my comic strip “Point Green,” or perhaps you’re a fan of graphic novels or webtoons like “Invincible” or “Lore Olympus.” Maybe you’re an art student or just a fan of art in general and you want to make your own comic to add to the legendary canon. These are the steps to making a great comic, whether it be a simple gag-a-day strip or an epic graphic novel that can be enjoyed by millions.

Step 1: Plan your story
Before you do any drawing, it is crucial that you have at least some kind of idea of where you want your story to go. The best way you can go about this is by writing an outline. That way, you can plan out scenes, character interactions and conflicts without going in without a plan expecting to remember every little detail only to forget later on. Eastfield offers creative writing classes that can help sharpen your skills for this step.
Step 2: Scripting and
storyboarding
For most comic makers, the next step is to write a script so your artist has an idea of what to draw. However, if you’re doing it on your own, there’s a different approach to doing this that I’ve discovered when developing my webcomic “My Blazing Husky.”
Do both scripting and storyboarding at the same time. Storyboarding is essentially drawing a small, very rough version of your comic pages so that you can conceptualize what you see in your mind. With that method, you can write down details of the idea while also being able to quickly visualize it. The key is to just make it quickly since this is just the early stages.
Step 3: Page set-up
Now that you’ve got your script and storyboards done, you might think that it’s immediately time to move on to drawing the final project. However, it’s imperative that you have the correct page dimensions, which you should consider before even writing the script. A typical size for graphic novels is 6 by 9 inches at 300 DPI with 0.5 inch margins. Keeping your story within these margins is key to keeping the viewer’s ability to engage with anything important like word balloons or major actions. To add, leaving about 0.125 inches of bleed on all sides, which is extra space that gets cut off during printing so that your drawings can go all the way to the edge of the page is crucial. You can also do it in other trim sizes, so long as you take margins and bleed into consideration.
Step 4: Lettering
Now you’re probably thinking, “When are we gonna get to the drawing?” Before that is one of the most important steps — lettering, or the art of creating word balloons. You do not want the art to overtake the room for words and you don’t want the words to cover up important parts of your art, so what do you do? You introduce them early so that they flow together on the page. So, before you do any drawing, copy and paste your thumbnail into the page file or rough out your page if you’re working on paper, and start your lettering early so that you can adjust your art if needed.
Step 5: Sketch both characters and backgrounds
Finally, you’ve made it, time to draw your characters! This part is pretty self explanatory, but remember that your art style doesn’t have to be perfect. If you want to learn how to draw, Eastfield offers both drawing and design classes that you can reference when making your comic.
Step 6: Coloring and inking
It’s time to ink and color your artwork, considered some of the most tedious parts of comic making. Keep in mind that this step is completely optional, as not all comics use color or smooth lines. For inking, choose a brush that suits you. It doesn’t have to be 100% smooth, a lot of good art has a uniquely textured style, so go with whichever suits your creativity the most.
For coloring, the best route is to color digitally, which can be achieved by scanning your paper into the computer using a scanner and adding color with softwares such as Photoshop or Clip Studio Paint. It’s important to know, however, that you need to keep the linework, colors and sketch on separate layers, as if they were all on the same layer and you tried to edit it later, it would be absolutely disastrous.
Just like that, you’re done! You’re off to make the next great hit on Amazon Kindle Direct Publishing or Webtoon Canvas! For further information, Star Prichard’s book “How To Webcomic” is definitely recommended and, while not every artist’s comic will be online, it still covers all the main bases of comic making. Eastfield’s campus is also home to many creative art and drawing classes. You can check the spring schedule on schedule.dallascollege.edu/SPRING/Prefix/ARTS. Happy creating, Harvesters!